How to join a meeting, let a person in from the waiting room, turn on system sound, record a lecture?
Method 1
Using desktop application Outlook 2016 version Office 365 (only Windows)
If you don’t have this option, go to Method 2.
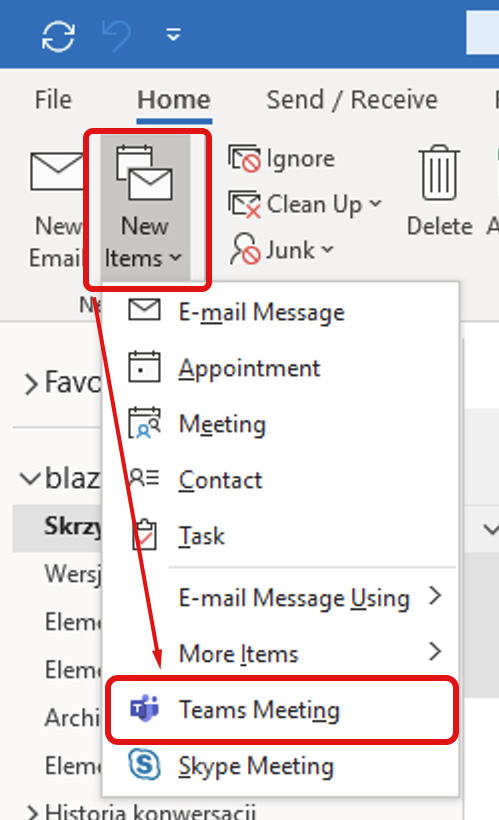
- Click New Items > Teams Meeting > fill in the start and end date; in Required field (it’s about people to be invited) enter at least one e-mail address (the e-mails of employees will be prompted here), you can provide any address from the internet (not necessarily existing)
- Continued at All Methods.
Method 2
Creating the meeting directly in the Teams calendar.
- Click on any area of the calendar choosing the day and time, a window will open:
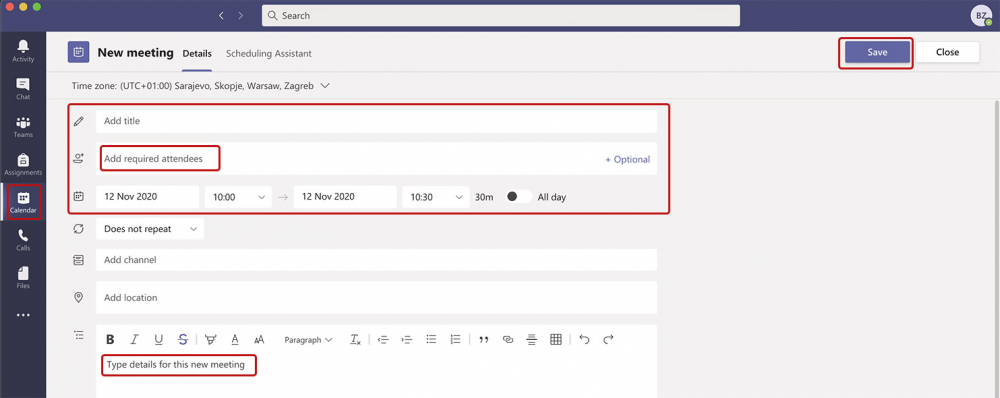
Top up as desired, but only after entering some e-mail address or selecting one participant from the list and confirming by Save/Send in the upper right corner – a link to the meeting will be generated, which we will see after reopening the saved meeting.
- You need to open a saved meeting and continue with the link as in the point All Methods below.
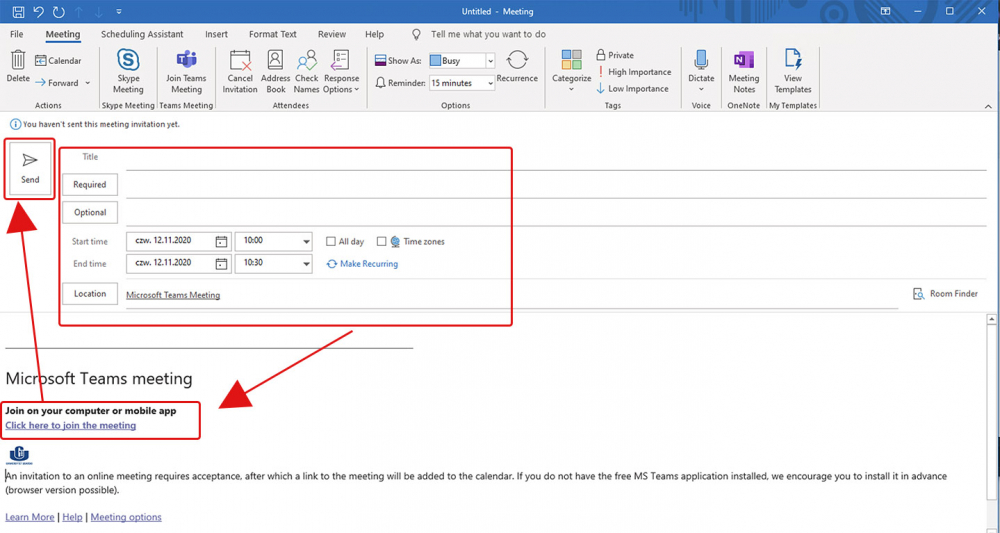
ALL METHODS
Copy the link hidden under the text: Join the meeting in the application Microsoft Teams, or whole text with the link (it’s looking better), and next to control the meeting, be sure to select Meeting options, located below the link.
Meeting options opens only in a browser window, therefore to have control over actually logged user it is better to set them in Teams being logged in by www (browser). We can change options right after sending the invitation.
- We define who can bypass the waiting room.
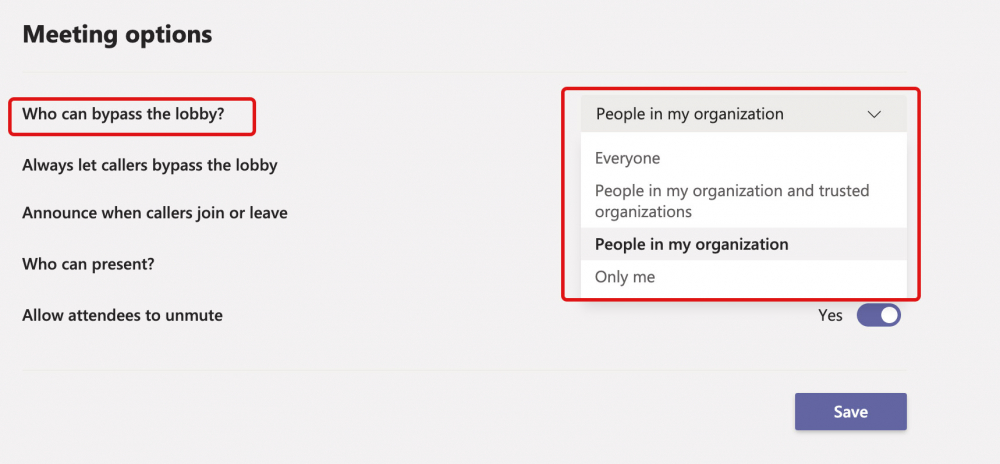
- Choose All, so that everyone can join our conference immediately (literally everyone on the internet who got the link) – immediately after entering any nickname they will enter the virtual meeting space and will be able to communicate with other participants (if only they are there at the same time).
- Choose People in my organization and trusted organizations, so that people who are not logged in to any account in service Microsoft 365 go to the waiting room.
- People in my organization – only people logged in to the same tenant can join the meeting with skipping the waiting room.
- Just me – everyone except the organizer will have to be admitted by him to the meeting.
Staying in the waiting room means that you will be admitted by organizator(s) to virtual meeting room, everyone will wait in isolated space from the rest of the waiting.
By not admitting people from the waiting room, we require students to log into their M365 accounts and we are sure about the presented names. People from the waiting room can enter anything in place of the participant ID displayed afterwards.
Additional footage of a Microsoft worker in Polish language: How to set permissions for meetings (the role of the presenter, mute, remove participants)?
- We define who can present
Available options depend on your global organization’s settings.
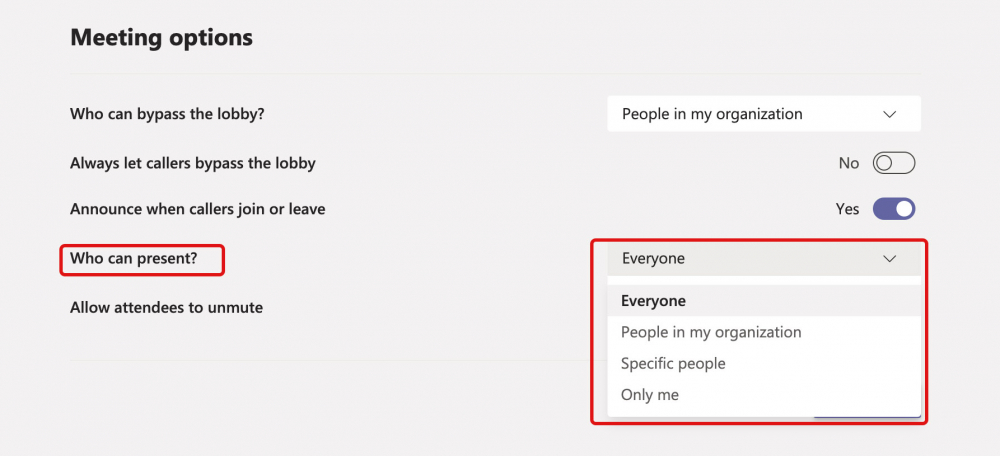
We strongly recommend using the option Only me.
The presenting person is the host, i.e. has the same rights as the meeting owner.
- We share obtained link to the videoconference (virtual meeting room) with students on any channel, e.g. through the Employee Portal (the link could be for example a consultation or a lecture). Details in the webinar How to send the message to students through the Employee Portal.
- Send an email to a group account of students or selected addresses (you should enter at least one email next to the option from method 2 – may be non-existent), and I will add an item in the calendar and the link will remain available there (I will use it during the meeting).
What do participants see after clicking the link to join?
- I choose the method of joining the meeting – in classic application or trough browser www (sometimes referred to as a web application).
The below picture may be different.
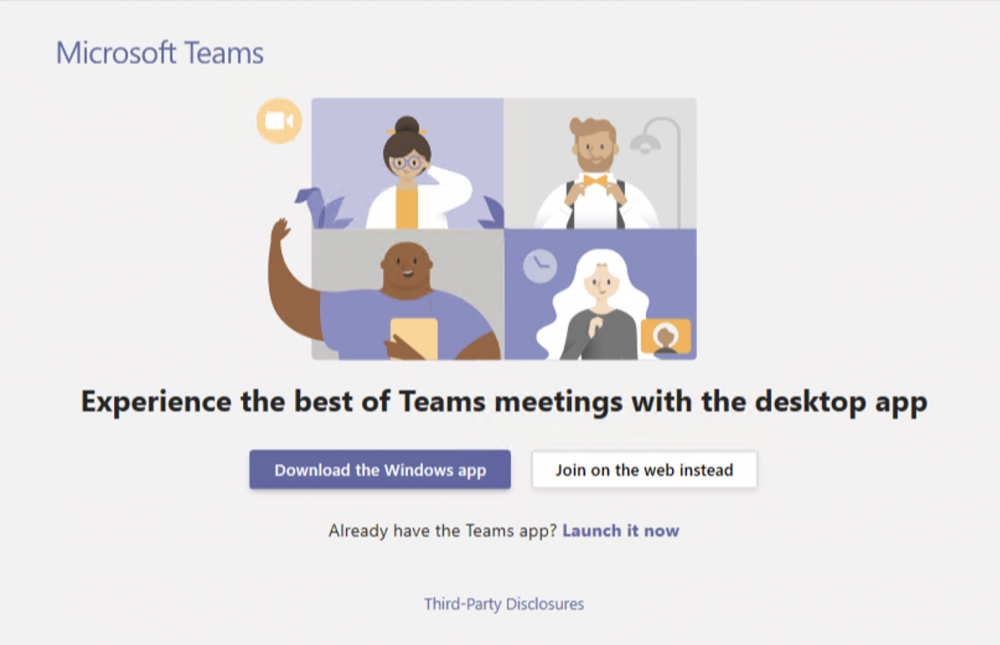
- Choose method of joining to the meeting.
- Log in if necessary – it is an obligation for the teachers and students – if I’m logged in to the application, it will open itself, when I’m not logged in I will attend as a guest and I can get the message as in point 4 below.
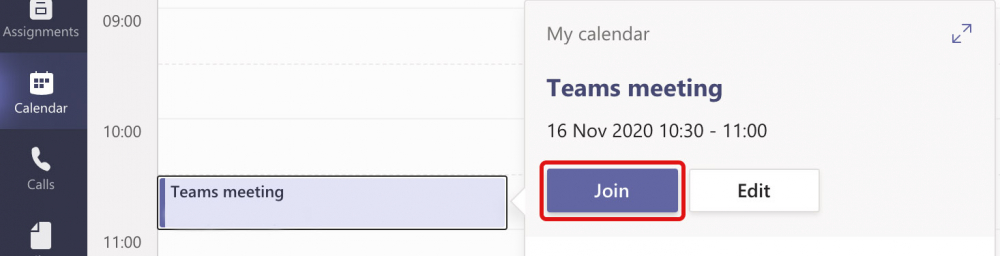
Anyone who accepted the meeting invitation and the inviter can for example enter in Teams>Calendar and click Join.
- If you are a participant not logged in you will be prompted to enter your name, and next you will receive the following message.

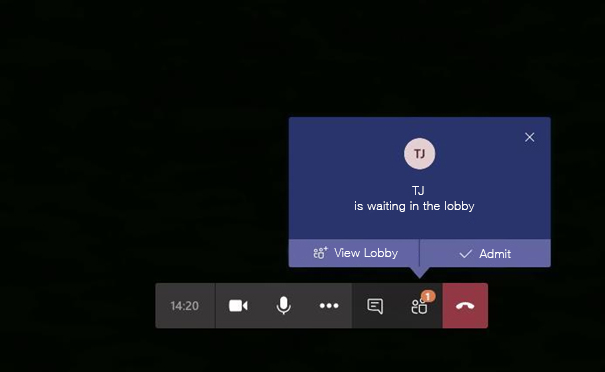
You go to the so-called waiting room.
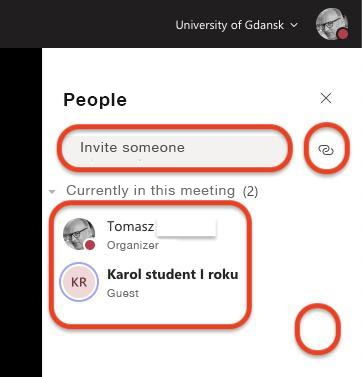
Now the inviter or another person with the presenter function must let me in, and clicking on the heads of people you can check who is attending the conference, and who is waiting to be admitted.
- We can download a link to the current meeting and share it further
- Start typing a name and include someone from the organization (the person will be called immediately)
- Check who is at the meeting
- Accept the waiting entry by clicking on tick near the name
- Mute all microphones with a single button
- Temporarily give the participant an opportunity to present the screen
How to share audio and screen from your computer?
To turn off the sound of shared footage meeting participants should during the presentation, and before sharing the screen, tick checkbox Include system audio, as shown in the screenshot below.
Additional footage of a Microsoft worker in Polish language: How to share the screen, applications, sounds from the computer?
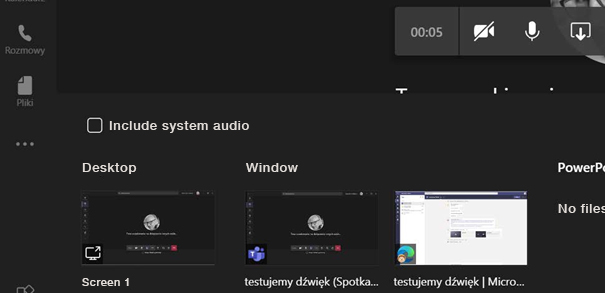
If the screen has already been shared, move the mouse over the top of the screen, then a control bar will appear, as below, on which to transmit system audio, including the sound of the presented movies on the listeners’ computers, please click on the computer icon so that it’s not crossed out. You will also hear all notifications coming to the host’s computer.

How to record a lecture?
After starting the meeting, click on the 3 dots and we choose Start recording.
Be aware, you have to stop recording before hanging up.
The recorded material will appear after starting the application Stream from the main panel https://office.com/ - there you can change the permissions of who can view it. By default, all meeting participants can play the material without download permission.


